Orange Vibe Jam: a post-mortem
How I built a browser-based game with Phaser.js, React, and Vite. Explore technical tradeoffs, custom pause systems, and lessons from a $100K hackathon.
Intended Audience: This write-up is for developers curious about browser-based game development using familiar tools like React and Vite.
Fun Fact: This game took me 34 days to build. At the time, I only knew React and had to pick up Phaser, Canvas manipulation and complex Vite setup. Out of those 34 days, I only slept for 4 full nights.
Live Demo: Play Here
A technical deep dive into the stack, tradeoffs, and painful lessons from a $100K Web3 hackathon
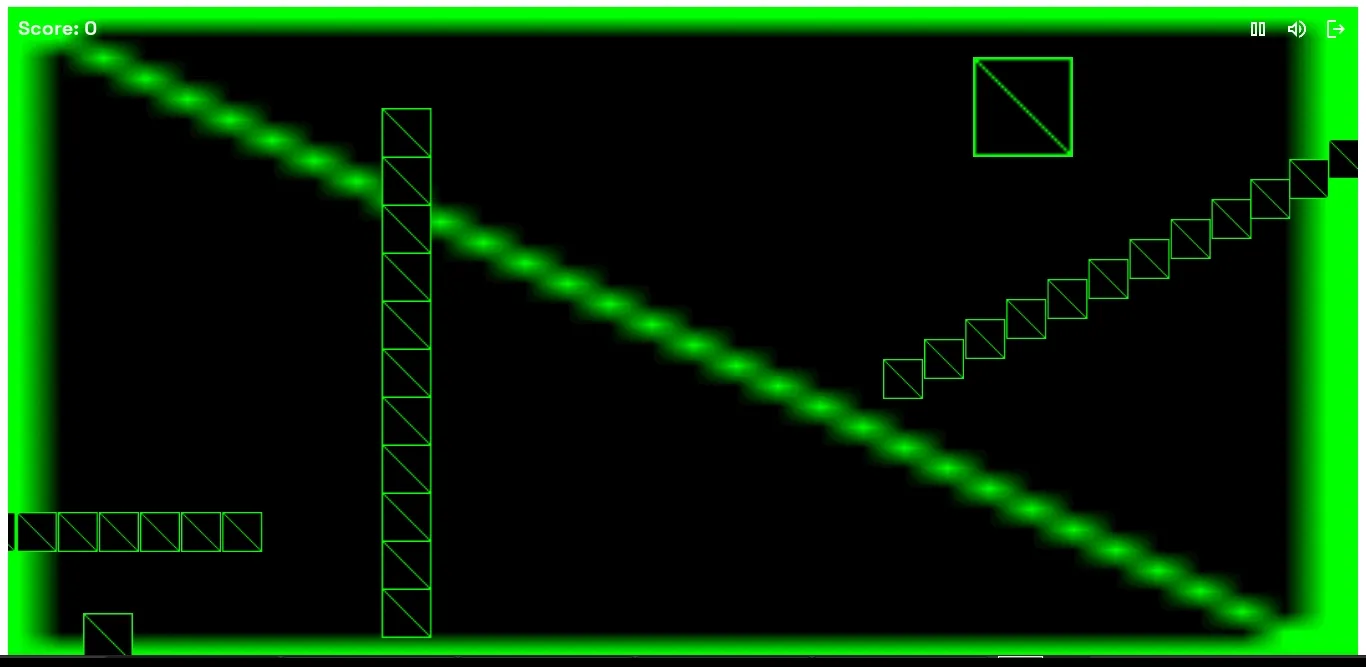
Figure 1. The dev progress from first draft to finished product
TL;DR
- Tech-stack: Phaser.js + React + Vite.
- Tradeoffs: Phaser saves time but has sparse docs. React/Phaser separation is clean but deep integration gets messy.
Why This Stack?
As hackathon constraints forced ruthless technical tradeoffs, I prioritized:
- Speed over familiarity: Vite’s Hot Module Replacement beat Webpack’s complex configurations.
- Separation of concerns: React for UI, Phaser for simulation.
- Web-native delivery: No installs, no Unity bloat—just a URL.
Here’s how each piece fit.
Tech Stack Breakdown
Phaser
Beyond the obvious perks of having built-in physics, plugin ecosystem, and lightweight 2D focus, I chose Phaser for a deeply personal reason: I’d played games made with it (looking at you, Mario-esque platformers). That credibility sold me.
But let’s be honest, the docs are sparse. The official documentation felt like a treasure hunt, and I spent more time on GitHub threads, obscure blogs, and AI chat-bots, just to piece together how things worked.
At the time of publication, Phaser docs is now accessible on their website. And AI is more powerful than it was during the time of the hackathon.
JavaScript
I’m a JavaScript dev at heart. The thought of learning both game dev and a new language like
C#/GDScript sounded like hackathon suicide. So I evaluated JS-based options:
| Library | Verdict |
|---|---|
Three.js | Overkill for 2D (it’s a 3D powerhouse). |
PixiJS | Great for rendering, but I’d need to wire physics/state myself. |
Phaser | Winner. It abstracts the boring stuff with APIs (view examples below) |
Table 1. Comparison between frameworks
Example: Setting Gravity
player.body.setGravityY(1000);Listing 1. Setting gravity with Phaser
// Gravity Logic
function applyGravity() {
    if (player.isGrounded) return; // Already on ground

    // Apply gravity (with terminal velocity cap)
    player.velocityY = Math.min(player.velocityY + GRAVITY, TERMINAL_VELOCITY);
    player.y += player.velocityY;

    // Ground collision
    if (player.y + player.height >= GROUND_Y) {
        player.y = GROUND_Y - player.height;
        player.isGrounded = true;
        player.velocityY = 0;
    }
}

// Game Loop
function gameLoop() {
    applyGravity();
    // ... (render player, handle input, etc.)
    requestAnimationFrame(gameLoop);
}
gameLoop();
Listing 2. Manual gravity simulation in vanilla JavaScript
Phaser is more than a library. It’s more like a hackathon time machine. You trade some control for all your sanity.
Batteries Included
Phaser defaults to canvas and handles the game loop, asset loading, and collision detection out of
the box. For a hackathon, I could focus on game design instead of reinventing wheels.
Example: Asset Loading
// Phaser
class PreloadScene extends Phaser.Scene {
    constructor() {
        super("PreloadScene");
    }

    preload() {
        this.load.image("player", "assets/player.png");
        this.load.spritesheet("enemy", "assets/enemy.png", { frameWidth: 32, frameHeight: 32 });
        this.load.audio("theme", "assets/music.mp3");
    }
}
Listing 3. Phaser’s built-in asset loader
async function loadAssets() {
    try {
        // Load images
        const playerImg = new Image();
        playerImg.src = "assets/player.png";
        await new Promise((resolve, reject) => {
            playerImg.onload = resolve;
            playerImg.onerror = () => reject(new Error("Failed to load player.png"));
        });

        // Load audio
        const themeAudio = new Audio("assets/music.mp3");
        themeAudio.preload = "auto";
        await new Promise((resolve) => {
            themeAudio.oncanplaythrough = resolve;
        });

        console.log("All assets loaded!");
        return { playerImg, themeAudio };
    } catch (error) {
        console.error("Asset loading failed:", error);
    }
}

// Usage
loadAssets().then((assets) => {
    document.body.appendChild(assets.playerImg); // Example DOM insertion
});
Listing 4. Manual asset loading in vanilla JavaScript
Differences: Phaser vs Vanilla Javascript
| Feature | Phaser | Vanilla Javascript |
|---|---|---|
| Asset Loading | Built-in loader handles spritesheets and audio automatically | Manual Promise chains for every image and audio tag |
| Physics | One line of code. player.body.setGravityY(1000) | Manual math for velocity, gravity, and floor collisions |
| Game Loop | Managed automatically with consistent delta time | Requires requestAnimationFrame and manual state updates |
| Rendering | Optimized Canvas/WebGL switching out of the box | Manual DOM manipulation or Canvas context drawing |
Table 2. Feature comparison between Phaser and Vanilla JS
Key Takeaways: Why This Matters for a Hackathon
- Phaser’s trade-off: Less control, more speed. Perfect for a hackathon, although less ideal for hyper-customized engines.
- Docs are rough, but the community and AI fills the gaps.
- Use the Language you know kept me sane. No regrets.
With Phaser chosen as the game engine, the next hurdle was making it coexist peacefully with React.
Integration: Harmonious Engineering
The DOM Split & Toggle Logic
The methods used in this article were done from the need for speed and experience at the time
To avoid React’s virtual DOM diffing and Phaser’s canvas fighting for control, I leveraged the
humble <div>:
#root: React’s mount point (for onboarding, rules, and post-game stats).#game-container: Phaser’s canvas home.
<!-- DOM Split -->
<style>
    #game-container {
        display: none;
    }
</style>
<body>
    <div id="root"></div>
    <div id="game-container"></div>
</body>

<!-- Phaser CDN (critical for setup)  -->
<script src="https://cdn.jsdelivr.net/npm/phaser@3.60.0/dist/phaser.min.js"></script>
Listing 5. The DOM Split
Handling the Game Loop UI
// Toggle visibility on game start (React code)
const gameContainer = document.getElementById("game-container");
gameContainer.style.display = "block";

// Load the Phaser game
const { default: initGame } = await import("../../phaser/main.js");
initGame();

const reactRoot = document.getElementById("root");
if (reactRoot) {
    reactRoot.style.display = "none";
}

// Toggle visibility on game end (Phaser Code)
function quitGame() {
    const game = document.getElementById("game-container");
    const root = document.getElementById("root");

    game.style.display = "none";
    root.style.display = "block";
}
Listing 6. React - Phaser toggle functions
d= CSSdisplayproperty
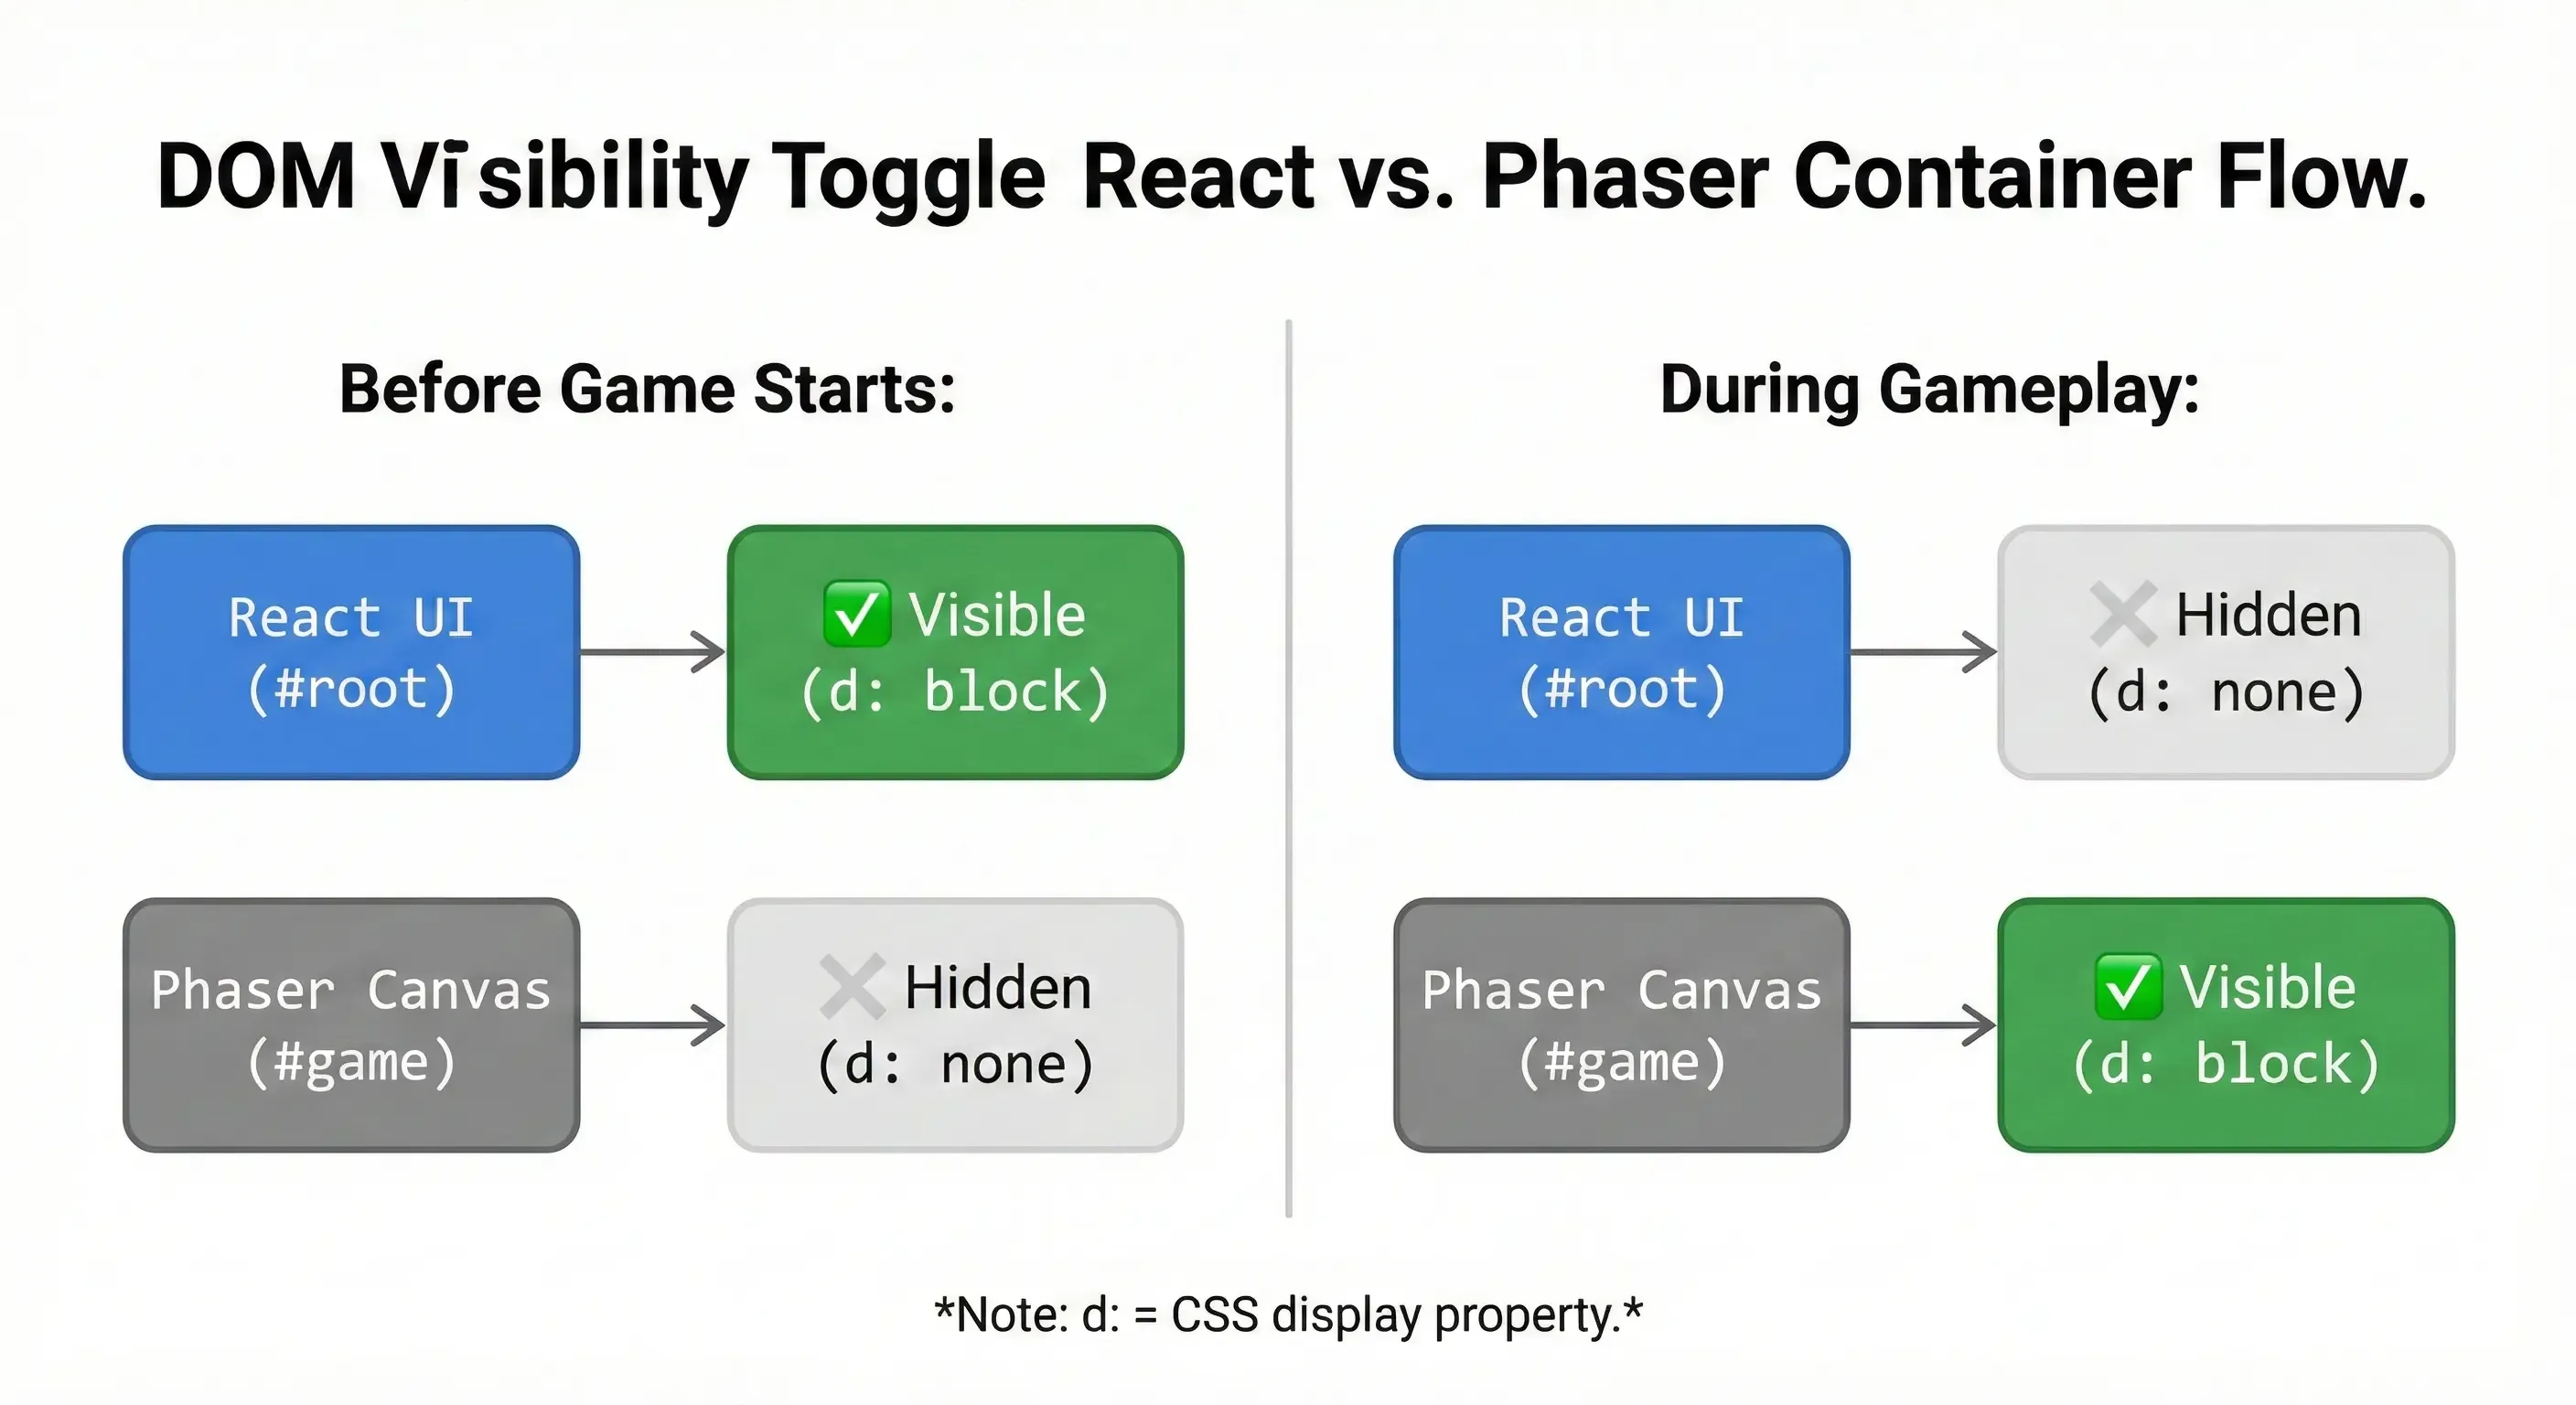 Figure 2. DOM visibility toggle between
 React and Phaser containers during gameplay flow.
Why this works:
- Performance: Phaser owns the canvas 100% during gameplay—no React state updates or re-renders.
- Simplicity: No need to bridge frameworks mid-game, though we’ll explore exceptions below.
- Phaser’s Built-in UI: Good Enough Since our game’s UI was lightweight (score counters, timers), we used Phaser’s native text and image APIs:
- No unnecessary React <---> Phaser communication overhead.
- Pixel-perfect positioning within the canvas.
- Pre-game: Rules, inspiration, and settings (complex UI easier in JSX).
- Post-game: Sharing scores/analytics (React’s state management).
// Example: In-game UI with Phaser
this.scoreText = this.add.text(10, 10, "Score: 0", { font: "16px Arial" });
Listing 7. Phaser text implementation function
For character skin, I’m experimenting with controlling Phaser from React, like passing a selected skin via localStorage or real-time updates through a shared state manager (Redux/Zustand).
Tooling with Vite
Vite’s zero-config magic worked perfectly for React but combining it with Phaser required some creative engineering. Unlike Webpack (where I’d have drown in loader configurations), Vite’s simplicity let me focus on the game, not tooling. Here’s how I tamed the beast:
Unlike Webpack, Vite was born ready. - Professor of Front-end Wizardry, Dr. K. (Master of Speed)
The Config That Made It Possible:
import { defineConfig } from "vite";
import react from "@vitejs/plugin-react";
import path from "path";

export default defineConfig({
    plugins: [react()],
    optimizeDeps: {
        include: ["react", "react-dom"], // Pre-bundle React for speed
    },
    build: {
        emptyOutDir: true, // Avoid stale files during rebuilds
        rollupOptions: {
            // Multi-page setup: React for UI, Phaser for game core
            input: {
                main: path.resolve(__dirname, "./index.html"), // React entry
                game: path.resolve(__dirname, "./src/phaser/main.js"), // Phaser entry
            },
            output: {
                // Keep builds separated to avoid collisions
                entryFileNames: "[name]/[name]-[hash].js",
                assetFileNames: "[name]/assets/[name]-[hash].[ext]",
            },
        },
        sourcemap: false, // Faster builds (sacrificed debugging for speed)
    },
});
Listing 8. We used Vite’s MPA setup to define separate entry points for the React UI and Phaser. This gave us full control over what loads when.
Vite Wins:
- No Phaser Plugin? No Problem: Vite’s Rollup underpinnings(as shown in the config) let us manually configure multi-entry builds.
- Instant Feedback: HMR kept our React UI updates snappy, while Phaser’s canvas reloaded cleanly.
Lessons Learned & Hard Truths
Technical Wins and the Pause Menu Struggle
- Separation of Concerns: Keeping game/logic decoupled from UI prevented spaghetti code.
- Vite’s Speed: Hot module reloading let me tweak mechanics and see changes instantly. (Not
new I guess)
“Vite’s ‘batteries-included’ approach helps, until you need to weld on new batteries. A few tweaks unlocked the best of both worlds.”
- Git Branching (Belatedly): I ignored branches until a failed React auth integration tangled
the codebase. Mid-project crisis made me realize the importance
Lesson: Branch first or cry later.
- Frequent Commits: When the physics engine broke post-refactor,
git bisectpinpointed the bad commit in minutes.New rule: Commit every small, working change.
Pro-Tip:
git bisectuses a binary search algorithm to find which commit in your history introduced a bug. It’s a lifesaver when you realize something broke but aren’t sure exactly when.
At first, I assumed pausing would be as simple as calling this.scene.pause(). But that didn’t cut it because of the many moving parts updated manually or via physics.
I ended up building this custom pause/resume system:
togglePause () {
  this.isPaused = !this.isPaused;

  if (this.isPaused) {
    this.physics.world.isPaused = true;
    this.time.paused = true;
    this.bgMusic.pause();
    this.pauseGame();

    this.scene.pause('GameScene');
  } else {
    this.physics.world.isPaused = false;
    this.time.paused = false;
    this.bgMusic.resume();
    this.resumeGame();

    this.scene.resume('GameScene');
  }
}
Listing 9. Toggle Pause/Play function
pauseGame () {
  this.isPaused = true;
  this.physics.world.isPaused = true;
  this.time.paused = true;

  pauseVelocity([
    ...this.obstacles.getChildren(),
    ...this.tokens.getChildren(),
    ...this.powerups.getChildren()
  ]);

  this.backgrounds.forEach(bg => {
    bg.tilePositionXFreeze = true;
  });
}

resumeGame () {
  this.isPaused = false;
  this.physics.world.isPaused = false;
  this.time.paused = false;

  resumeVelocity([
    ...this.obstacles.getChildren(),
    ...this.tokens.getChildren(),
    ...this.powerups.getChildren()
  ]);

  this.backgrounds.forEach(bg => {
    bg.tilePositionXFreeze = false;
  });
}
Listing 10. Pause/ Play Helper functions
This system works by:
- Toggling physics.world.isPaused and time.paused
- Freezing/resuming tilePositionX movement of background layers
- Calling pauseVelocity() and resumeVelocity() on all dynamic objects
Even though the rest of the project felt straightforward, this part alone burned more hours than any other feature.
Git Discipline & Workflow
I finally internalized the “commit often” mantra. Midway through, a change broke something crucial and I hadn’t committed in a while. Debugging became a nightmare. I learnt albeit the hard way that frequent commits aren’t just tidy, they’re checkpoints you’ll thank yourself for later.
Branching also bit me. I added a sign-in flow directly to main, assuming it’d be quick. It wasn’t. The feature ballooned and touched core logic. Undoing the damage without a dedicated branch? Brutal.
A few things I learnt:
- Commit early, commit often—it’s your personal undo button.
- Always branch for new features, no matter how “small” they seem.
- Planning matters. Git hygiene saved me, but a better structure would’ve saved even more time.
- Scope Ruthlessly: We planned 10 features; 4 shipped. MVP-first next time!.
- Team Screening: Our “illustrator” ghosted us, forcing last-minute asset scrambles.
Lesson: Vet collaborators or go solo.
Final Thoughts
This project pushed me to bridge multiple web technologies under intense time pressure. While not every feature made it into the final MVP, I came away with stronger skills in architecture, tool-chain optimization, and development workflow. Most importantly, I now understand how to document and reflect on technical decisions with clarity—something I’ll carry into every future project.
Demo
Live Demo: Play Here